Epoxy Floor Coatings — Two-Component Systems, Surface Prep, and Specification
1 April 2026 · ProPainterTools
Epoxy Floor Coatings: Two-Component Systems, Surface Prep, and Specification
Epoxy floor coatings are one of the most technically demanding applications in the architectural painting trade. The chemistry is unforgiving — wrong surface prep, wrong substrate moisture, wrong mix ratio, or wrong temperature produces a system that peels within weeks. Done correctly, a properly specified and applied two-component epoxy floor system will survive years of vehicular, chemical, and abrasion exposure. This guide covers everything required to specify and apply epoxy floor systems professionally.
Epoxy Chemistry: How It Works
Epoxy floor coatings are two-component systems: a Part A (epoxy resin) and a Part B (curing agent, also called hardener). Mixed in a specific ratio, they undergo a chemical reaction (cross-linking) that converts the liquid into a hard, thermoset film. Unlike latex paints that cure by solvent evaporation, epoxy cures by chemical reaction — the process is irreversible, and once cured, the film cannot be dissolved or remelted.
The pot life is the working time after mixing before the material begins to gel and becomes unusable. Pot life is temperature-dependent — at 20°C, a typical epoxy pot life is 30–45 minutes. At 30°C, it may be as short as 15–20 minutes. Never mix more material than can be applied within the pot life.
Standard vs Cycloaliphatic Epoxy
Standard (bisphenol A/F) epoxy is appropriate for interior floors not exposed to UV. It is the most common epoxy chemistry for garage floors, warehouse floors, and industrial interiors. Standard epoxy will yellow and chalk under UV exposure — it is not suitable for exterior applications or skylighted areas without a UV-stable topcoat.
Cycloaliphatic epoxy is UV-stable and does not yellow. It is used for exterior-exposed applications and for installations where appearance retention matters (showrooms, commercial interiors with natural light). It is more expensive than standard epoxy.
Polyaspartic topcoats are a polyurea-based technology increasingly used as a UV-stable topcoat over epoxy base coats. Polyaspartics cure faster than epoxy (can recoat in 1–2 hours at 20°C), are UV-stable, and provide a harder, more scratch-resistant surface than epoxy alone. A common specification for high-traffic residential or light commercial floors is: epoxy basecoat → broadcast aggregate → polyaspartic topcoat.
Surface Preparation Requirements
Epoxy floor coating failure is caused by inadequate surface preparation in the majority of cases. The concrete must be:
- Clean and contaminant-free — oil, grease, curing compounds, sealers, adhesive residue, and laitance all prevent bonding. Decontaminate with appropriate cleaning agents (alkaline degreaser for oil, chemical stripper for adhesives) before mechanical preparation.
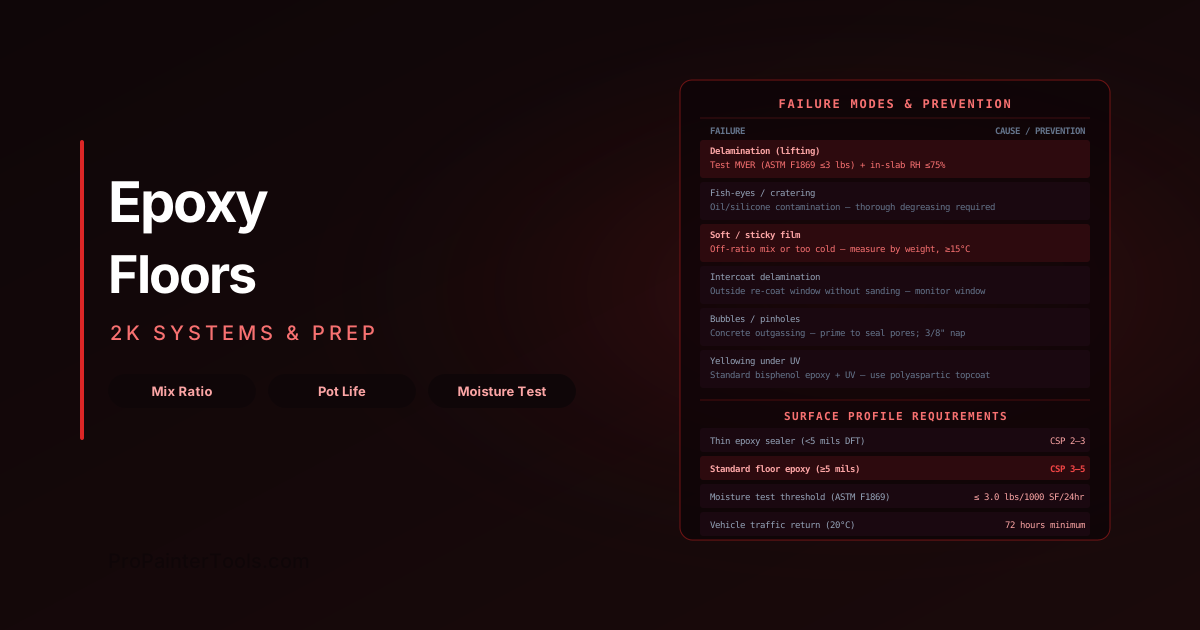
- Mechanically profiled — the concrete surface must have a CSP (Concrete Surface Profile) rating of CSP 3–5 for high-build epoxy systems (>5 mils DFT). CSP is defined by ICRI Technical Guideline 310.2. For thin epoxy sealers (<5 mils), CSP 2–3 is acceptable.
CSP Level Method Application CSP 1–2 Acid etch (ASTM D4260) Thin penetrating sealer only CSP 3–4 Diamond grind or light shot blast Standard floor epoxy CSP 4–6 Shot blast High-build or thick-film epoxy - Moisture vapour within limits — see below. Moisture is the number one cause of epoxy delamination.
Moisture Testing
Two standardised tests determine whether the concrete substrate is sufficiently dry for epoxy application:
ASTM F2170 (In-slab relative humidity): A probe is inserted into a drilled hole at 40% slab depth and sealed for equilibration (minimum 72 hours). The reading must be ≤75–80% RH for most epoxy systems. Some moisture-tolerant primers specify up to 90% RH — verify against the system PDS.
ASTM F1869 (Calcium chloride test): A sealed dish of calcium chloride is placed on the slab surface for 60–72 hours. The moisture vapour emission rate (MVER) must be ≤3.0 lbs/1000 SF/24 hours for standard epoxy. Some systems allow up to 5.0 lbs/1000 SF/24 hours with moisture-mitigating primer.
Critical: Do not skip moisture testing. Concrete can look and feel dry while emitting moisture vapour at a rate that will destroy an epoxy bond within weeks. Slabs on-grade without a vapour barrier are particularly high risk.
System Selection
Residential Garage Floor
Specification: Moisture-tolerant epoxy primer → epoxy basecoat (colour) → broadcast vinyl chip or quartz → seal coat (polyaspartic or clear epoxy). Total DFT 15–25 mils.
Why this system: The chip or quartz broadcast creates a slip-resistant surface and hides future scuffs and tyre marks. The seal coat protects the broadcast from lifting under vehicle traffic.
Commercial / Light Industrial (Forklift Traffic)
Specification: Epoxy primer (high-build) → two coats of high-solids epoxy (80–100% solids) → polyaspartic or polyurethane topcoat. Total DFT 20–40 mils.
Why this system: High-solids epoxy reduces shrinkage and provides better chemical resistance. The urethane or polyaspartic topcoat adds scratch resistance and UV stability.
Chemical-Resistant Floor (Laboratories, Manufacturing)
Specification: Novolac epoxy or furane resin system — higher cross-link density provides superior chemical resistance. Must be specified based on the specific chemicals in service (acids, solvents, caustics have different resistance profiles). Verify resistance against the manufacturer's chemical resistance chart.
Warehouse / High-Traffic Slab Sealer
Specification: Single-component acrylic floor sealer or penetrating silane/siloxane sealer. This is NOT an epoxy system — it is a lower-cost maintenance solution for industrial slabs where aesthetics are secondary. Reapplication every 2–5 years.
Mixing and Application
Mixing
- Allow both components to reach 15–25°C before mixing — cold epoxy has very high viscosity and mixes poorly.
- Pre-mix each component separately before combining.
- Combine at the exact mix ratio stated in the PDS (by volume OR by weight — not interchangeable).
- Mix thoroughly for the manufacturer-specified time (typically 3 minutes with a slow-speed drill and paddle mixer).
- Pour out of the mixing container — epoxy generates heat (exotherm) in the bucket, which accelerates gelling. Spread immediately.
Application
- Roller application: 3/8" nap roller for basecoat, 1/4" nap for topcoat. Use a primer coat applied by squeegee or roller to fill pores before the main coat.
- Broadcast: Apply aggregate immediately after rolling while the epoxy is still wet. Back-roll the broadcast lightly to ensure embedment, or apply seal coat to lock broadcast in place.
- Airless spray: Some contractors spray high-build coats — tip 0.021–0.023", 2500–3000 psi. Maintain wet film on the floor.
- Re-coat window: Most epoxy systems have a re-coat window of 8–24 hours at 20°C. Re-coating after the window closes requires mechanical abrasion (sanding) to restore adhesion — this is the "inter-coat adhesion" window. Exceeding the window and not sanding is a common cause of intercoat delamination.
Temperature and Humidity
- Apply between 10°C and 30°C — below 10°C, cure is very slow and film formation is poor. Above 30°C, pot life is too short for large areas.
- Substrate temperature must be ≥3°C above dewpoint — condensation on the slab surface is invisible to the eye but catastrophic for adhesion.
- Avoid humidity >85% RH during application and cure.
Common Failure Modes and Prevention
| Failure | Cause | Prevention |
|---|---|---|
| Delamination (sheets lifting) | Moisture vapour under film | Test MVER and in-slab RH before application |
| Fish-eyes and cratering | Oil or silicone contamination | Thorough degreasing; solvent wipe test |
| Soft or sticky film | Off-ratio mix; insufficient cure time; too cold | Measure by weight; maintain temp ≥15°C |
| Intercoat delamination | Applied outside re-coat window without abrasion | Monitor window; sand if exceeded |
| Bubbles / pinholes | Outgassing from concrete; roller nap too thick | Prime to seal pores; use 3/8" nap; back-roll |
| Yellowing | Standard epoxy + UV exposure | Use cycloaliphatic epoxy or polyaspartic topcoat |
For concrete surface profile guidance and CSP measurement methods, see our masonry and concrete surface prep guide. For moisture vapour testing methods in context, see our moisture testing guide. For two-component coating chemistry across other systems, see our 2K coating systems guide. For residential garage floor coating — the full application system from prep through chip broadcast and polyaspartic topcoat — see our epoxy garage floor coating guide.
ProPainterTools helps you document the full epoxy specification — product, batch numbers, mix ratio, application temperature, and moisture test results — creating a project record that supports warranty claims and client sign-off.
Frequently Asked Questions
How long before a vehicle can drive on an epoxy floor? Light foot traffic is typically permitted at 24 hours at 20°C. Vehicle traffic requires 72 hours minimum; fork truck traffic requires 7 full days of cure at 20°C. At lower temperatures, extend these times. Always verify against the specific system's PDS.
Can epoxy be applied over an existing epoxy floor? Yes, but only within the re-coat window or after mechanical abrasion. Sand the existing surface with 80-grit, remove all dust, and apply new coat. Adhesion of new epoxy to old cured epoxy without abrasion is very poor.
Why is my epoxy floor delaminating in spots? Localised delamination is usually caused by point contamination (oil drips, silicone) that was not removed during prep. Full-area delamination is usually moisture vapour. Run the calcium chloride test on a delaminated spot by cutting out a section and testing the underside — if the underside is wet or stained, moisture is the cause.
What is the difference between 100% solids and standard solids epoxy? 100% solids epoxy contains no carrier solvent — all of the material becomes film. Standard solids (50–70%) lose volume to solvent evaporation. 100% solids builds more film per coat and has negligible VOC, but has very short pot life and requires careful application technique.
