Building a Painting Portfolio Online — Photography, Case Studies, and Platforms
22 April 2026 · ProPainterTools
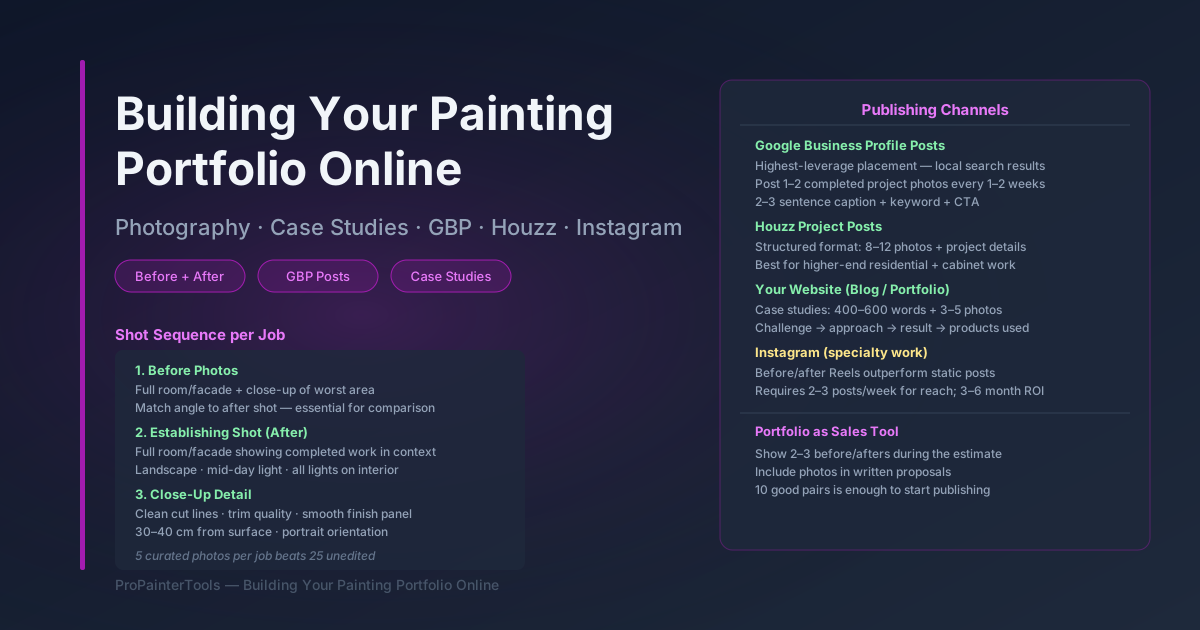
Building a Painting Portfolio Online: Photography, Case Studies, and Platforms
Most painting contractors underinvest in job photography and then compete on price because they cannot demonstrate quality visually. A client evaluating two painting contractors — one with 30 high-quality project photos organised by job type, and one with six blurry phone shots — will pay a premium to the first contractor without understanding exactly why. The quality of your portfolio communicates competence before you meet the client. This guide covers how to photograph painting work effectively, how to organise and publish it, and how to use your portfolio as an active sales tool.
Equipment for Job Photography
You do not need professional photography equipment. A current-generation smartphone (iPhone or Android with a recent camera module) produces photos sufficient for every portfolio and marketing purpose. The limiting factor is almost never equipment — it is technique, lighting, and selection.
Recommended equipment:
- Smartphone: iPhone 13 or later, or equivalent Android with 12MP+ camera. Use the native camera app; third-party apps add complexity without meaningful improvement.
- Clip-on wide-angle lens (optional): A $20–$40 clip-on lens for your phone increases field of view in tight rooms where backing up is not possible. Useful for interior work; less necessary for exteriors.
- Portable LED panel light (optional): A compact LED panel ($40–$80) fills shadows in dark interiors and adds even light to close-up detail shots. Not essential for most photography, but useful for cabinet work, high-gloss trim, or specialty finishes.
- Tripod or stand (optional): For very low-light interiors, a stable phone tripod prevents motion blur. Otherwise, bracing against a wall or leaning on a surface is sufficient.
What you do not need: A DSLR or mirrorless camera is not necessary. Drone photography (useful for exterior elevation shots on large commercial buildings) is an optional add-on once you have a solid portfolio of ground-level photography. Staging furniture or decor is not necessary — photograph the work itself.
The Shot Sequence for Each Job
For every job worth adding to your portfolio, capture three types of photos:
1. Before Photos
The before photo is essential — without it, the after photo has no context. Take before photos during your initial site visit or on the first morning of the job, before any prep work begins.
What to capture before:
- Full room or facade showing the existing condition (peeling, discolouration, patchy repairs, dated colour)
- Close-up of the worst area — a blistering section, a water-stained ceiling, a severely chalked exterior section
Technique: Match your after photo angle as closely as possible. If you photograph the room from the doorway at 5 feet, photograph the after from the same position. Matched angles make the comparison visually immediate.
2. Establishing Shot (After)
A full-room or full-facade photo showing the completed work in context. This is the hero image for your portfolio.
Technique:
- Shoot in landscape orientation
- Find the corner or angle that shows the most wall surface
- Make sure the room is clean — drop cloths removed, furniture back in place if possible (ask the homeowner)
- Shoot in the middle of the day when exterior light is bright and even; for interiors, turn on all available lights
- Avoid direct sun through windows creating strong glare; if unavoidable, shoot on an overcast day or early morning
3. Close-Up Detail Shot
A tight photo showing the quality of your application — clean cut lines, smooth finish, precise trim work, seamless patch repair. This is what separates a portfolio showing effort from one showing skill.
What to capture close-up:
- A trim/wall transition showing a clean cut line
- A smooth section of high-gloss trim showing reflection quality
- A corner showing consistent coverage to the edge
- A repaired area showing complete blending (especially valuable for patch repairs)
- Any specialty work — faux finish, colour block, cabinet refinishing, textured application
Technique: Get 30–40 cm from the surface. Use portrait orientation for trim details. Ensure focus is on the painted surface, not the background. Check that the photo is sharp before moving on — reshoot if blurry.
Organising Your Portfolio
An unorganised photo library is not a portfolio. Organise your photos before publishing them anywhere.
Folder structure: Create a folder per job with the job name and date. Within each job folder: Before, After, Detail. This makes it fast to find and export photos when needed.
Minimum to save per job: 1–2 before photos, 1 establishing shot, 1–2 detail shots. Five photos per job is enough. Do not publish 25 photos from one project — curate ruthlessly. Quality over quantity.
Organise for clients by project type, not chronologically:
- Exterior repaints
- Interior repaint — residential
- Cabinet and trim refinishing
- Commercial and office
- Specialty finishes and feature walls
- New construction
A client considering interior repaints wants to see interior repaints, not scroll through a mix of every job type in date order.
Google Business Profile Posts
Your Google Business Profile (GBP) posts are the highest-leverage place to publish completed project photos — they appear directly in local search results and in your profile map listing. Post a completed project photo every 1–2 weeks.
GBP post format for completed projects:
- 1–2 photos (before + after, or establishing shot + detail)
- Caption: 2–3 sentences describing the project — location (suburb, not address), scope, product or colour if noteworthy, and a brief outcome statement
- Include one relevant keyword naturally (e.g., "exterior repaint," "cabinet refinishing," "interior painting")
- Add a call to action: "Request a free quote via the link."
Example caption: "Exterior repaint in Northfield — full scrape and prime of weathered cedar siding followed by two coats of SW Emerald in Accessible Beige. New trim colour in Extra White adds definition to the roofline. Enquiries open for spring bookings."
What not to do on GBP: Do not post photos taken inside a client's home without permission (some clients are private). Do not post photos with visible personal items, family photos, or identifiable personal property. Ask clients if they are comfortable with before-and-after photos being published — most are; ask anyway.
Case Study Format
For larger or more complex projects, a written case study is more persuasive than a photo gallery alone. A case study explains the challenge, your approach, and the result — giving prospective clients a mental model for how you handle problems.
Case study structure (400–600 words):
- The project: Property type, location (suburb), and scope in one sentence
- The challenge: What was the specific problem — failing substrate, colour complexity, access difficulty, tight schedule, occupied space?
- Your approach: What did you do specifically that another contractor might not — substrate investigation, custom colour matching, phased scheduling, lead-safe work practices?
- The result: What does it look like, and what is the client's experience?
- Project details: Products used, timeline, crew size
- 3–5 photos: Before, progress (optional), and after
Where to publish case studies: Your own website (blog or portfolio section) is the primary location — this builds your site's organic search content. Secondary: Houzz project posts (which have a similar structured format), LinkedIn for commercial work.
Houzz and Instagram
Houzz: Houzz project posts are purpose-built for contractor portfolio work — they accept multiple photos per project with project details, products used, and location. A complete Houzz project post with 8–12 photos ranks in Houzz search and drives enquiries from homeowners actively planning renovations. Houzz is most effective for higher-end residential work, cabinet refinishing, decorative finishes, and new construction.
Instagram: Instagram is a visual search engine for home renovation ideas. Before-and-after reels and high-quality photos of specialty finishes perform well. The audience is homeowners browsing inspiration — they are pre-qualified for renovation intent. Instagram requires consistent posting (minimum 2–3 posts per week) to build reach; the return on time investment is higher for specialty painting (faux finishes, cabinet work, exterior transformations) than for standard residential repaint.
What to post on Instagram:
- Before-and-after Reels (short video format performs better than static photos in the algorithm)
- Close-up detail shots with a brief technical caption
- Colour trend content (seasonal)
- Behind-the-scenes prep work (spray setup, masking, surface prep) — this communicates professionalism to homeowners who do not see what happens before the roller touches the wall
Using Your Portfolio as a Sales Tool
A portfolio is not just marketing — it is an active sales tool used during the estimating conversation.
In-person or virtual estimates: Have your portfolio accessible on your phone. When you identify the scope — say, exterior repaint with significant paint failure — show 2–3 before/after examples of similar work you have done. "Here's a project we did on a similar property last spring — the cedar was in about this condition, and here's how it came out." This de-risks the decision for the client and demonstrates competence directly relevant to their job.
Proposal inclusions: Add 2–3 portfolio photos directly into your written proposal — one before/after that matches the job type, one close-up detail. A proposal with photos of your previous work is visually differentiated from a text-only quote and communicates that you are a business, not a tradesperson with a phone.
Online reviews and portfolio integration: Ask clients who leave positive Google reviews if you can add their project to your portfolio. A link from the review to the project photos creates a credibility loop — the review mentions the project, the photo demonstrates the outcome.
For the marketing channels that distribute your portfolio to prospective clients, see our marketing guide. For the estimating tools that convert portfolio-driven enquiries into signed jobs, see our estimating guide.
ProPainterTools generates professional proposals that include project details and summary information — the document that accompanies your portfolio in the estimating conversation.
Frequently Asked Questions
How many portfolio photos do I need to get started? Ten good before-and-after pairs — representing at least three different project types — is enough to have an effective portfolio. Do not wait until you have 100 photos. Start publishing when you have 10, and add consistently.
Should I hire a professional photographer for key projects? For a particularly high-value project — a large exterior repaint on a striking home, a complex cabinet refinishing job, a specialty faux finish — hiring a professional architectural photographer for 2–3 hours ($300–$600) produces a hero image that anchors your portfolio and justifies premium pricing in client conversations. One or two professional photos among phone photos is a good investment once you have established your portfolio base.
Do I need client permission to photograph and publish their home? Best practice is to ask. Most residential clients are happy to allow before-and-after photos if you do not identify their address or show identifiable personal property. A brief written permission (a checkbox in your job completion form or a short email confirmation) protects you from any later objection. For commercial clients, written permission is more important — some have brand or confidentiality policies about their facilities.
How do I photograph cabinets well? Even, raking light is essential for cabinets — it shows the smoothness of the finish by revealing or hiding stipple and brush marks. A portable LED panel positioned to the side (not directly facing the surface) creates controlled raking light. Shoot open cabinets showing the box and door face simultaneously. A pull-out drawer shown partly open is a standard composition for cabinet photography.
