Kitchen Cabinet Refinishing for Contractors — Process, Finish Systems, and Pricing
23 April 2026 · ProPainterTools
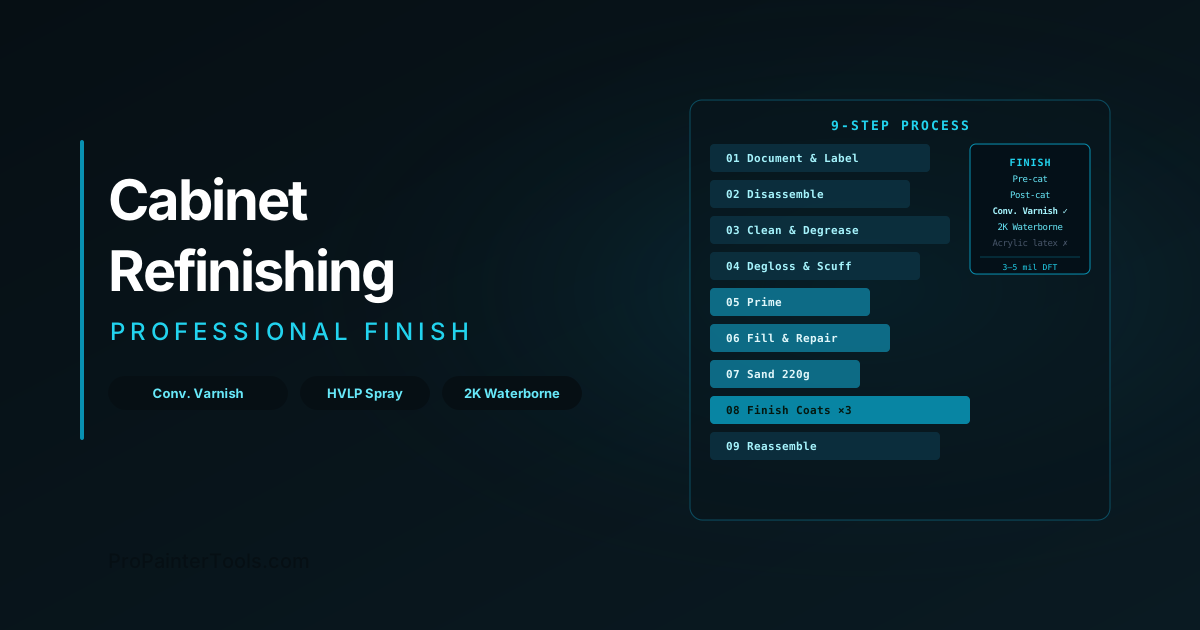
Kitchen Cabinet Refinishing for Contractors: Process, Finish Systems, and Pricing
Cabinet refinishing is one of the highest-margin services in residential painting — and one of the most technically demanding. A bad cabinet job is visible every time the homeowner opens a drawer. Done right, it commands $1,500–$6,000+ for a standard kitchen and delivers a result that competes with replacement at a fraction of the cost. This guide covers the 9-step professional refinishing process, how to choose the right finish system for each client situation, HVLP equipment selection, and the production rates and pricing benchmarks that make this work profitable.
Why Cabinet Work Is Different
Cabinet finishing is finish carpentry work applied in a production environment. Unlike wall painting, where minor surface imperfections are forgiving, cabinet finishes are inspected from 12 inches under bright kitchen lighting. Every prep shortcut shows.
The professional standard also means durable film builds: a properly catalysed finish on cabinets must withstand repeated cleaning, moisture from cooking, and the abrasion of daily use. Architectural latex paint is not appropriate for cabinet surfaces regardless of what the paint can says.
The 9-Step Refinishing Process
Step 1: Document and Label
Before removing anything, photograph the entire kitchen. Number every door and drawer with a painter's tape label that identifies its position (e.g., "Upper-L-1" reading left to right). Doors returned to the wrong location is one of the most common callbacks in cabinet work.
Step 2: Disassemble
Remove all doors and drawer fronts. Remove hardware — hinges, knobs, pulls — and bag per cabinet or per zone. Do not attempt to spray with hardware in place; overspray inside hinge recesses is nearly impossible to clean.
Step 3: Clean and Degrease
Kitchen cabinet surfaces carry grease, silicone from furniture polish, and wax from previous cleaning products. None of these are visible but all will cause fisheye and adhesion failure.
Clean with a dedicated degreaser (TSP substitute, commercial degreaser) applied generously and wiped down. For heavily contaminated surfaces, a second pass with denatured alcohol removes residual silicone contamination. Do not skip this step — adhesion failures on cabinet work are almost always traced to inadequate degreasing.
Step 4: Degloss and Scuff
Degloss removes the microscopic surface sheen that prevents primer adhesion. Options:
- Chemical deglosser (liquid sander): fast, works well on smooth factory finishes
- 120-grit scuff sanding: more thorough, required on peeling or heavily degraded existing finishes
Scuff lightly — the goal is adhesion profile, not material removal. Wipe all sanding dust with a tack cloth before proceeding.
Step 5: Prime
The primer bridges the adhesion gap between the existing substrate (MDF, hardwood, previous factory lacquer) and your finish coats.
Primer selection:
- Shellac-based primer (Zinsser BIN): best adhesion and stain blocking, grain-raises on wood — requires dewaxed shellac or compatible topcoat
- High-build automotive-style primer-surfacer: levels minor surface imperfections, requires sanding
- System-matched primer: most finish system manufacturers offer a companion primer that is chemically optimised for their topcoat — always the safest choice when using catalysed systems
Apply by spray only — brush or roller marks in primer transfer directly to the topcoat. Apply two light coats rather than one heavy coat to avoid runs.
Step 6: Fill and Repair
After priming reveals the surface, you will see every grain, ding, and previous repair that was invisible before. Fill with a grain filler or lightweight body filler (not drywall compound), applied and block-sanded (150 grit). This step separates jobs that look like a painted kitchen from jobs that look like a refinished kitchen.
Step 7: Sand
Sand all primed surfaces to 180–220 grit. The goal is a surface so smooth that it feels like it has already been topcoated. Wipe with a tack cloth.
Step 8: Apply Finish Coats
Two finish coats minimum. Three coats are standard for white and light colours where coverage and depth matter.
Between coats: Light scuff sand with 320 grit or a grey Scotch-Brite pad, tack clean. This removes dust nibs and improves inter-coat adhesion.
Film build targets:
- Pre-catalysed lacquer: 2–3 mils DFT total
- Conversion varnish: 3–5 mils DFT total
- 2K waterborne polyurethane: 3–4 mils DFT total
Step 9: Reassemble and Reinstall
Let the finish cure before reassembling. Full chemical cure (not just dry-to-touch) for catalysed finishes is 7–14 days at room temperature. Reinstall hardware, rehang doors, reinstall drawers. Adjust hinges. Final walkthrough with the client.
Finish System Comparison
| System | Durability | Dry Time | VOC | Best For |
|---|---|---|---|---|
| Pre-catalysed lacquer | Good | 30–45 min recoat | Moderate-high | Cost-efficient, fast production |
| Post-catalysed lacquer | Very good | 1–2 hr recoat | High | Better durability than pre-cat |
| Conversion varnish | Excellent | 2–4 hr recoat | High | Highest durability, professional standard |
| 2K waterborne polyurethane | Excellent | 2–3 hr recoat | Low | Low-VOC requirement, matches durability |
| Waterborne acrylic (non-catalysed) | Fair | 1–2 hr recoat | Low | Not recommended for kitchen duty |
The working recommendation: Conversion varnish is the professional benchmark for cabinet durability and the correct choice for clients who want the longest-lasting result. 2K waterborne systems (such as Target EM6000 or equivalent) deliver comparable durability with significantly lower VOC and are the right choice when spraying indoors without adequate solvent exhaust ventilation.
Pre-catalysed lacquer is a production-speed choice — faster recoat, easier cleanup — but with lower long-term durability than conversion varnish. It is appropriate for rental properties or clients with budget constraints, not as a default.
See our wood finishing systems guide for full technical detail on resin chemistry, pot life, and inter-coat compatibility across these systems.
HVLP Equipment for Cabinet Work
Cabinet work is HVLP territory. Airless atomisation is too coarse for the fine finish quality required; AAA (air-assisted airless) is used in high-volume production shops. For a contractor spraying kitchens on-site, a turbine HVLP or conversion HVLP (connected to a compressor) is the correct tool.
Turbine HVLP (e.g., Graco Finex, Fuji Q-Series):
- Self-contained, portable — ideal for on-site spraying
- Warm-air atomisation reduces dry spray
- 3–5 stage turbines suitable for production use; avoid 2-stage turbines for catalysed finishes
Conversion HVLP:
- Uses a standard compressor at regulated inlet pressure (typically 10–25 PSI at the cap)
- More setup required but produces comparable results to turbine for experienced operators
Tip sizing for cabinet work:
- Pre-cat lacquer and conversion varnish: 1.3–1.5mm fluid tip
- 2K waterborne: 1.4–1.8mm (higher viscosity)
- Primer-surfacer: 1.8–2.0mm
For a detailed breakdown of tip code decoding, fan width, and pressure methodology, see our professional sprayer guide.
Production Rates and Pricing
Representative production benchmarks:
| Task | Rate |
|---|---|
| Disassemble / document kitchen | 1.5–2.5 hrs |
| Clean and degrease (per door) | 3–5 min |
| Sand/degloss (per door, both sides) | 5–10 min |
| Spray prime (per door, both sides) | 3–5 min (spray time only) |
| Fill and sand (per door) | 8–15 min |
| Spray finish coat (per door, both sides) | 3–5 min (spray time only) |
| Reassemble and reinstall | 1.5–2.5 hrs |
Door count: Count every door and drawer front as one unit. A standard kitchen has 25–40 units including uppers, lowers, pantry, and island.
Pricing benchmarks (US market, 2025–2026):
- Budget range (pre-cat lacquer, minimal repairs): $80–$120 per door/drawer front
- Mid-range (conversion varnish, standard prep): $120–$180 per door/drawer front
- Premium (conversion varnish, full fill-and-level process, 3 finish coats): $180–$280 per door/drawer front
Example bid: 32-door kitchen, conversion varnish, standard prep:
- 32 units × $150 average = $4,800 doors and drawers
- Box faces and frames: typically add 50–75% of door price
- Hardware removal/reinstall: included
- Total bid range: $7,500–$10,000+
Use the ProPainterTools estimating calculator to build this out as a full job-cost estimate with labour burden and overhead before finalising your price.
Frequently Asked Questions
Do I need to spray cabinet refinishing, or can I brush and roll? Spray only. Brush marks and roller stipple are visible on cabinets under normal kitchen lighting and are not acceptable in a professional refinishing job. A turbine HVLP is the minimum entry point for offering cabinet refinishing commercially.
Can I refinish cabinets in the home without setting up a spray booth? Yes — with correct containment. Plastic-sheet the kitchen from adjacent rooms, cover all countertops and appliances, and use a HEPA air scrubber to control overspray. Some contractors spray doors in a garage or workshop and do the box frames in place. The key requirement is adequate air movement to carry solvent vapour out of the space.
How long should I tell the client the kitchen will be out of use? Plan for a 3–5 day project for a standard kitchen (full days on prep + prime, then topcoat in 2–3 sessions with cure time between). The kitchen is typically usable within 24 hours of the final coat drying, but full chemical cure for catalysed finishes takes 7–14 days — communicate that doors should be handled gently for the first week.
What if the existing finish is peeling or previously repainted with latex? Budget for more prep. Peeling or incompatible previous coatings must be removed or fully scuffed and tested for adhesion before applying a catalysed system over them. A cross-hatch adhesion test (ASTM D3359) after your first prime coat is essential — if there is any delamination, you need to remove the existing finish entirely before proceeding.
