Adhesion Testing and Failure Diagnosis for Painting Contractors
7 March 2026 · ProPainterTools
Adhesion Testing and Failure Diagnosis for Painting Contractors
Adhesion failures are the most expensive callbacks in the painting trade. They develop months after project completion, they produce visible, undeniable defects, and they almost always trace to a decision made before a drop of topcoat was applied. The contractor who tests adhesion before committing to a coating system over unknown existing paint — and who understands how to read the results — eliminates a class of warranty claims that regularly cost contractors thousands of dollars in remediation labour. This guide covers the two primary adhesion tests, how to interpret failure modes, and how to use the diagnosis to make the right remediation decision.
When to Test Adhesion
Adhesion testing is appropriate — and professionally defensible — in several situations:
- Before recoating an existing paint system whose age, type, or condition is unknown
- When the existing system appears chalky, soft, or laminating (multiple layers visible at chip edges)
- Before applying a premium coating system over a substrate you cannot control (owner-furnished paint, pre-primed cladding, unknown factory finish)
- After adhesion failure has occurred — to determine failure mode and root cause before proposing remediation
- When writing a warranty clause on a project with existing coatings — testing gives you a defensible basis for the warranty scope
Testing before the job makes you the professional. Testing after a callback makes you the defendant.
Cross-Hatch Adhesion Test (ASTM D3359 Method B)
The cross-hatch test is the standard field adhesion test for dry film thicknesses up to 5 mils. It is quick, requires minimal equipment, and provides a rated result.
Equipment required:
- Cross-hatch cutter guide or a sharp blade and straight edge
- 25mm (1") pressure-sensitive tape (Scotch 610 or equivalent, as specified by ASTM D3359)
- Magnifying glass or loupe (optional but useful)
Procedure:
- Apply the test at a location representative of the coating system — avoid edges, laps, and areas of obvious damage
- Using the cross-hatch guide (or carefully with a blade), make 6 parallel cuts through the coating to the substrate, 1–2mm apart
- Make another 6 cuts perpendicular to the first, creating a 25-cut grid
- Remove all dust with a soft brush
- Apply a 25mm length of tape firmly over the grid, pressing with a thumb or eraser. No air pockets
- Remove the tape sharply at 180° (back over itself) in 0.5–1 second
- Inspect the tape and the grid under good lighting
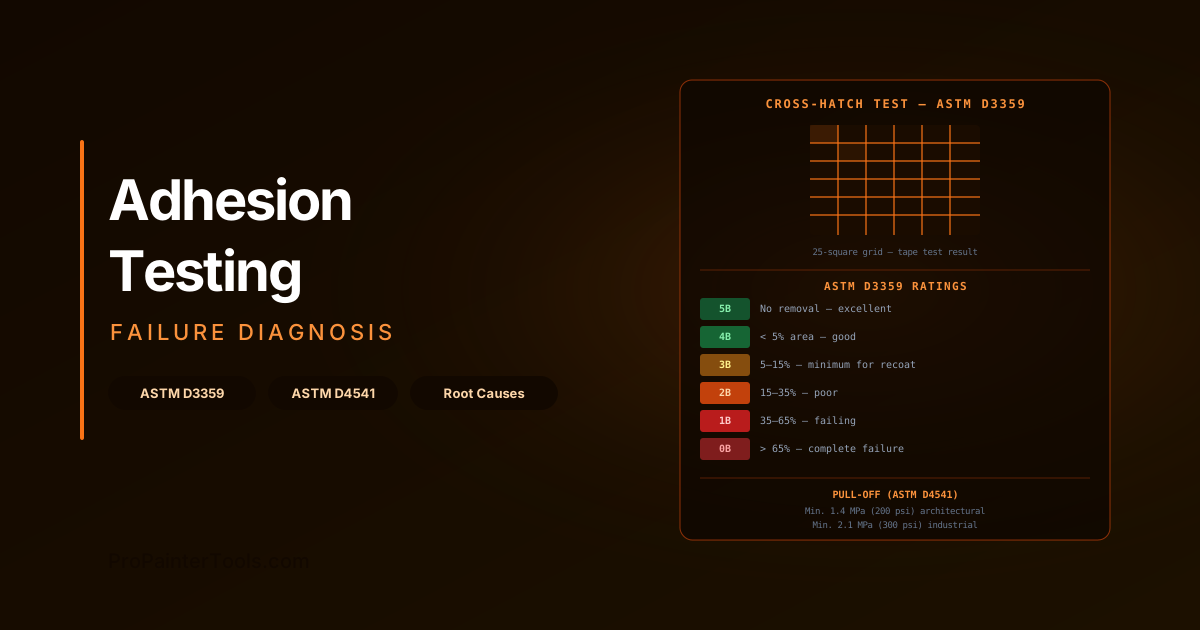
ASTM D3359 rating scale:
| Rating | Description | Acceptance |
|---|---|---|
| 5B | No removal — edges perfectly smooth | Excellent |
| 4B | < 5% of grid squares affected | Good |
| 3B | 5–15% of grid area removed | Marginal |
| 2B | 15–35% of grid area removed | Poor |
| 1B | 35–65% of grid area removed | Failing |
| 0B | > 65% removal | Complete failure |
Minimum acceptable result for recoating: 3B or better. A result of 2B or worse means the existing coating system has insufficient adhesion to serve as a base for a new coating, and remediation is required before proceeding.
Pull-Off Adhesion Test (ASTM D4541)
Pull-off testing measures the actual tensile force required to separate the coating from the substrate, reported in MPa or psi. It is more quantitative than the cross-hatch test and is the standard for industrial and structural coating specifications.
Equipment required:
- Portable adhesion tester (e.g., PosiTest AT, Elcometer 510, or equivalent)
- Dolly (20mm diameter for most portable testers)
- Slow-cure epoxy adhesive
Procedure:
- Lightly sand the coating surface where the dolly will be bonded (no more than 120 grit, 3–5 strokes)
- Mix and apply slow-cure epoxy to the dolly face; press firmly onto the prepared surface; remove squeeze-out
- Allow epoxy to cure per the manufacturer's instructions (typically 8–24 hours at room temperature)
- Score around the dolly perimeter with a sharp blade through to the substrate — this ensures the test measures the coating adhesion within the dolly area, not the surrounding material
- Attach the tester to the dolly and apply load at the specified rate (ASTM D4541: 1 MPa/s for most testers)
- Record the pull-off value and the failure location
Interpreting pull-off results:
| Result | Meaning |
|---|---|
| Pull-off > 1.4 MPa (200 psi) with adhesive failure | Coating adhesion exceeds 1.4 MPa — acceptable for most architectural recoat |
| Pull-off > 2.1 MPa (300 psi) with adhesive failure | Acceptable for industrial and protective coating applications |
| Pull-off value < minimum with intercoat failure | Adhesion between existing layers is inadequate — the weakest layer must be removed |
| Pull-off value < minimum with substrate failure | Substrate (concrete, wood, etc.) is failing — coating system is not the issue |
| Epoxy failure during test | Adhesive failure of the test itself — test is invalid; retest with better cure or better surface prep |
Reading Failure Location: The Most Important Data Point
The pull-off value matters less than where the coating separated. Failure location tells you which interface is the weak point in the system:
Adhesive failure (A): Coating detached cleanly from the substrate. The coating has no meaningful adhesion to the substrate. Cause: contaminated substrate, inadequate profile, wrong primer, wrong substrate condition at time of application.
Cohesive failure (C): Failure occurred within one coating layer. The layer itself is too soft or too brittle. Cause: under-mixed 2K product, application below minimum temperature, incompatible solvent attack from subsequent coat.
Intercoat adhesive failure (A/B or B/C): Failure at the interface between two coating layers. Each layer may adhere well to its substrate individually, but the layers have insufficient adhesion to each other. Cause: inter-coat window exceeded, surface contamination between coats, incompatible product combination, over-applied film between coats (solvent trapping).
Substrate failure (Y): The substrate itself failed (concrete pull-out, wood surface fibre tearing). This indicates the substrate is weak — the coating adhesion exceeds the substrate cohesive strength. Common with weak concrete (< 1.5 MPa tensile) or severely degraded wood. The coating is not the problem; the substrate is.
Common Root Causes by Failure Mode
| Failure Pattern | Root Cause(s) |
|---|---|
| Adhesive failure, wood substrate | Moisture content too high at application; contamination (oil, silicone); no primer; mill glaze not removed |
| Adhesive failure, concrete | Laitance not removed; acid etch insufficient; moisture vapour pressure |
| Adhesive failure, previously painted surface | Existing coating chalked or softened; contamination; wrong primer for existing resin type |
| Intercoat failure between two latex coats | Over-applied film (> 6 mils WFT) trapping solvent; topcoat applied before undercoat fully cured |
| Intercoat failure, oil under latex | Incompatible resin systems; old alkyd not scuffed before applying acrylic |
| Cohesive failure within epoxy | Improper mix ratio; application below minimum temperature; pot life exceeded |
| Cohesive failure within conversion varnish | Under-catalysed; applied in cold conditions |
For recoating decisions where adhesion testing indicates underlying failure, see our peeling paint diagnosis and repair guide. For the coating chemistry behind intercoat compatibility, see our professional coating guide.
What to Do After a Failed Test
A failed adhesion test is not a dead end — it is a decision point. The correct response depends on the scope, the substrate, and the budget:
Strip and start over: Required when multiple coating layers have poor adhesion, when moisture intrusion is the root cause, or when the existing paint type is incompatible with the specified topcoat system. This is the only option that removes the risk entirely.
Spot-remediate the failed areas: Viable when adhesion failure is localised (e.g., the north face only, or areas below a leaking gutter). Remove and reprime failed areas; retest before proceeding.
Adjust the coating specification: If adhesive failure is marginal (2B/1B on cross-hatch) and the root cause is surface contamination, additional cleaning and a bonding primer can recover the system. Test again after the remediation step.
Document and exclude from warranty: If the owner declines remediation, document the test results, state the recommendation in writing, and exclude the affected surfaces from your warranty. Never apply new coatings over a known failing system without written client acknowledgement.
Test adhesion at the quote stage on high-risk repaints and include the result in your proposal documentation. Use ProPainterTools to record pre-existing conditions and test results as part of your project file — this documentation protects you in any warranty dispute.
Frequently Asked Questions
How many adhesion test locations are needed for a typical residential repaint? SSPC-PA2 (the standard for industrial coatings) requires 5 readings per 100 SF for DFT testing; for adhesion, the guidance is less prescriptive. For a residential repaint, test at least 3 locations per elevation or surface type — one representative middle area, one near ground level where moisture is highest, and one near any penetration or area of visible condition change.
Can I do a quick field test without the ASTM equipment? Yes — the tape test gives a fast qualitative result. Press high-tack tape firmly onto a clean area of the existing coating and remove sharply. If paint comes off with the tape, adhesion is inadequate. This is not a rated test but it quickly flags surfaces that need formal testing or full investigation.
What is the difference between ASTM D3359 Method A and Method B? Method A uses an X-cut pattern and tape test, used for coatings > 5 mils DFT. Method B uses the cross-hatch grid pattern described above, used for coatings ≤ 5 mils. For most architectural repaints (existing latex coatings, 2–4 mils DFT), Method B applies.
Who pays for adhesion testing? On high-value projects or repaints over unknown existing systems, include adhesion testing as a line item in your estimate. On standard residential repaints where the existing coating is well-maintained latex, a quick tape test during the site visit is adequate and is absorbed into your pre-quote time.
