Air Compressors for Painters — CFM Requirements, Tank Sizing, and Moisture Management
14 April 2026 · ProPainterTools
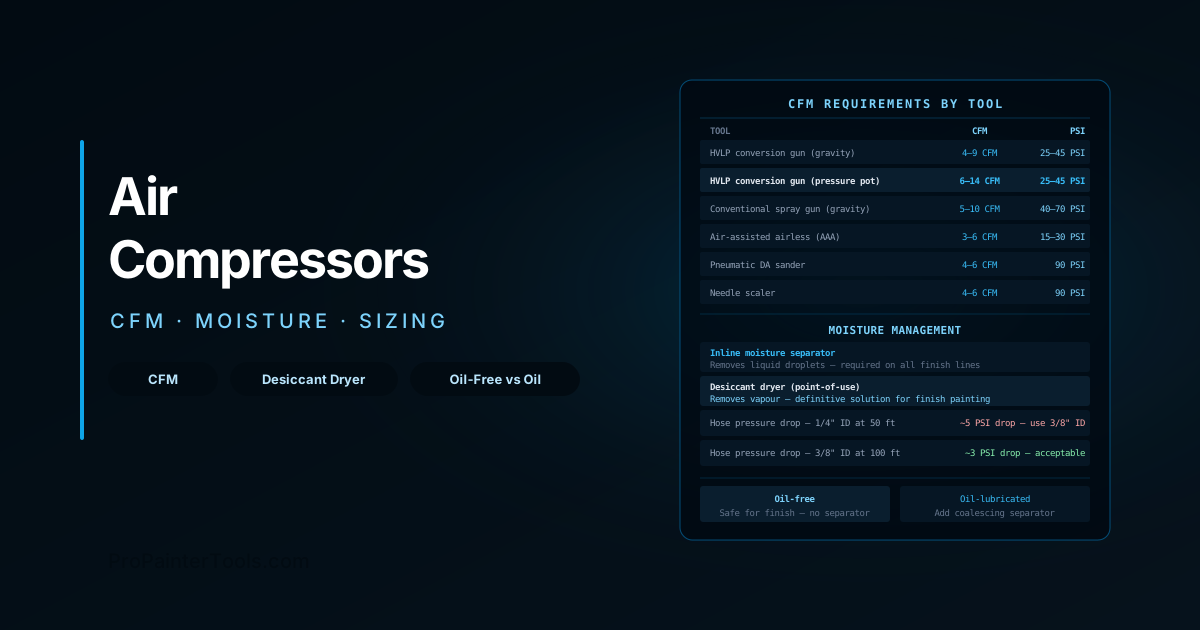
Air Compressors for Painters: CFM Requirements, Tank Sizing, and Moisture Management
An undersized compressor starves HVLP spray guns and pneumatic tools of air, causing pressure drop mid-stroke and an inconsistent spray pattern. An improperly maintained compressor delivers moisture-contaminated air that causes fish-eyes and adhesion failure in finish coats. For painting contractors who use HVLP or conventional spray guns, understanding air supply is as important as understanding the gun or the material being applied. This guide covers CFM requirements, compressor selection, and the moisture management that separates finish-quality compressed air from shop-grade air.
CFM: The Number That Actually Matters
Most painters focus on PSI (pounds per square inch) when selecting a compressor — the wrong metric. The relevant specification is CFM (cubic feet per minute), which measures the volume of air the compressor can deliver continuously at a given pressure.
A compressor tank stores compressed air, allowing short bursts above the compressor's sustained delivery rate. But if the tool demands more air than the compressor can sustain, the tank depletes and the compressor cannot keep up — pressure drops mid-application.
The test: A compressor that can sustain the required CFM at the required working pressure is correctly sized. Tank size extends the duration of bursts; it does not increase sustained CFM.
CFM Requirements by Tool Type
| Tool | CFM at Working PSI | Working PSI |
|---|---|---|
| HVLP turbine-fed gun (built-in turbine) | N/A — self-contained | 2–10 PSI (low-pressure stage) |
| HVLP conversion gun (gravity feed) | 4–9 CFM | 25–45 PSI at the air cap |
| HVLP conversion gun (pressure pot) | 6–14 CFM | 25–45 PSI at the air cap |
| Conventional spray gun (gravity) | 5–10 CFM | 40–70 PSI at the gun |
| Air-assisted airless (AAA) | 3–6 CFM | 15–30 PSI air assist |
| DA sander (pneumatic) | 4–6 CFM | 90 PSI |
| Needle scaler | 4–6 CFM | 90 PSI |
| Air nozzle / blow gun | 1–3 CFM | 30–90 PSI |
| Caulk gun (air-powered) | 1–2 CFM | 60–90 PSI |
HVLP note: HVLP conversion guns (also called compliant guns) are the most common spray tool for architectural finish work. A high-quality HVLP gun such as a DeVilbiss or Sata requires 6–9 CFM at the air cap. The compressor must sustain this — not just burst to it. If your compressor is rated at 6 CFM at 90 PSI, it will deliver significantly less at 40 PSI (air delivery drops with back-pressure). Always check the CFM rating at the working PSI, not at 90 PSI.
Tank Sizing
Tank capacity is measured in gallons (US) or litres. A larger tank extends the burst duration before the compressor catches up, which reduces compressor motor cycling frequency on intermittent-use tools.
For continuous spray work: Tank size matters less than sustained CFM. A small tank on a high-CFM compressor outperforms a large tank on an undersized compressor for sustained HVLP spraying.
For intermittent tools (sanders, nail guns, blow guns): A larger tank (20–60 gallons) is beneficial. The tool draws from the stored air in bursts, and the compressor refills the tank between bursts without running continuously.
Practical sizing:
- HVLP finish work only: 1–6 gallon pancake compressor with adequate CFM (6–9 CFM at 40 PSI) is sufficient for a single gun — small and portable.
- Mixed use (HVLP + pneumatic prep tools): 20–30 gallon upright compressor with 8–12 CFM at 90 PSI.
- Crew with multiple tools: 60+ gallon with 15+ CFM, or a two-stage compressor.
Oil-Free vs Oil-Lubricated Compressors
This is the most important selection decision for finish painting work.
Oil-Lubricated Compressor
How it works: A splash-lubricated or pressure-lubricated pump uses oil to reduce friction and seal piston rings. More efficient and longer-lived than oil-free designs.
Finish work risk: Oil-lubricated compressors can inject trace amounts of oil aerosol into the air stream. In a spray line without an oil separator, this oil reaches the gun and the finish — producing fish-eyes (silicone-like craters) in lacquer, varnish, and enamel finishes. A quality coalescing oil-water separator installed in the air line removes oil from the compressed air stream and makes oil-lubricated compressors acceptable for finish work.
Best for: High-volume, sustained production work where the compressor is heavily used and long service life matters. Add oil separator to the air line.
Oil-Free Compressor
How it works: Uses PTFE-coated rings or a friction-reducing surface treatment to eliminate the need for oil in the pump. No oil in the air stream.
Finish work: Oil-free compressors are safe for finish work without an oil separator. No oil contamination risk.
Trade-off: Oil-free pumps run louder, run hotter, and typically have a shorter service life than oil-lubricated equivalents. They are also not user-serviceable in the same way — piston ring replacement on an oil-free compressor is often not economically practical.
Best for: Portable, intermittent use. Ideal for job-site HVLP work where portability is important and sustained heavy use is not.
Recommendation for finish painters: Use an oil-free compressor for finish work, or an oil-lubricated compressor with a quality coalescing separator and inline desiccant dryer.
Moisture Management
Compressed air contains atmospheric moisture. When air is compressed, the moisture concentration increases proportionally. As the compressed air cools in the tank and hose, water condenses. Liquid water in the air line reaches the gun as droplets and contaminates the finish — fish-eyes, blistering, and adhesion failure result.
Moisture management is mandatory for finish painting work.
Aftercooler
Installed between the compressor and the tank, an aftercooler uses a heat exchanger to cool the compressed air before it enters the tank. Most moisture condenses at the aftercooler and is drained. Primarily found on industrial compressors — most job-site compressors do not have one.
Inline Moisture Separator (Water Trap)
A mechanical separator installed in the air line uses centrifugal action or a baffle to separate liquid droplets from the air stream. Captures liquid water that has condensed in the tank or hose. Required on all air lines used for finish work. Empty the bowl after each use.
Limitation: A water trap does not remove water vapour — it captures only liquid droplets. In humid conditions or with a warm compressed air stream, vapour passes through and condenses at the gun.
Desiccant Dryer
A desiccant dryer contains a bed of desiccant material (silica gel or activated aluminium) that adsorbs water vapour from the compressed air stream. This is the definitive solution for moisture-free air in finish painting applications.
Types:
- Point-of-use desiccant filter: A small cartridge installed at the gun. Inexpensive; requires periodic desiccant replacement (when the colour indicator changes from blue to pink for silica gel). Good for intermittent HVLP work.
- Inline desiccant dryer: A larger unit installed in the main air line, treating all air before distribution. Better for sustained production or multiple tools.
Desiccant regeneration: Saturated desiccant can be regenerated by baking in an oven at 120°C for 2–3 hours. Alternatively, replace the desiccant cartridge — most point-of-use filters use replaceable cartridges.
Pressure Drop Across Hose Length
Pressure drops along the length of an air hose due to friction losses. A longer, narrower hose delivers lower pressure at the gun than at the compressor outlet. This is a common reason for HVLP spray quality problems when using long hose runs.
Pressure drop by hose size:
| Hose ID | 50 ft run | 100 ft run | 200 ft run |
|---|---|---|---|
| 1/4" | ~5 PSI drop | ~10 PSI drop | ~20+ PSI drop |
| 3/8" | ~1 PSI drop | ~3 PSI drop | ~6 PSI drop |
Practical guidance:
- For HVLP at working pressures of 25–45 PSI: use 3/8" ID hose. 1/4" hose causes unacceptable pressure drop at typical job-site hose lengths.
- Set compressor outlet pressure to compensate for hose drop: if the gun requires 35 PSI at the air cap and the hose drops 5 PSI, set the compressor regulator to 40 PSI.
- Minimise hose length — coil up excess rather than running unnecessary length.
Compressor Maintenance
Daily:
- Drain the tank moisture drain valve at the end of each day — liquid water accumulates in the tank base and promotes internal corrosion. Tilt the compressor slightly if the drain valve is at the side.
- Empty moisture separator bowls.
Weekly:
- Check oil level on oil-lubricated compressors.
- Inspect air filter — clean if dusty.
Monthly:
- Check belt tension on belt-drive compressors.
- Inspect for air leaks at fittings — a soapy water spray on connections reveals leaks.
Annually:
- Change oil on oil-lubricated compressors.
- Replace intake air filter.
- Inspect safety relief valve — the valve must open at the rated pressure. Test by pulling the ring manually.
For spray gun and HVLP equipment selection, see our pro sprayer guide. For PPE requirements when spraying with compressed air systems, including isocyanate-containing materials, see our safety gear and PPE guide.
Frequently Asked Questions
How do I know if my compressor has enough CFM for my HVLP gun? Check the gun's specification for required CFM at the air cap pressure. Then check your compressor's CFM output at the same PSI. Compressor specifications usually state CFM at 90 PSI — HVLP guns operate at 25–45 PSI, and compressor output at lower back-pressure is higher. A quick field test: run the gun at full trigger for 60 seconds. If the compressor keeps up and pressure holds steady, the CFM is adequate. If pressure drops and the motor runs continuously without recovering, the compressor is undersized for sustained use.
Can I use my airless sprayer compressor for HVLP? Airless sprayers are self-contained hydraulic systems — they do not use compressed air. If you mean a small compressor you purchased for inflation and pneumatic tools, check its sustained CFM. Most small pancake compressors (1–6 gallon) deliver 2–4 CFM at 40 PSI — adequate for some HVLP guns but marginal for high-CFM guns. Check the gun spec.
Why is my HVLP finish coming out orange-peel textured? Orange peel in HVLP finish is caused by insufficient atomisation — usually low air pressure at the gun, too high viscosity, too far spray distance, or an incorrect air cap. Check: (1) CFM and PSI at the gun are within spec; (2) material viscosity is within the gun's range; (3) spray distance is 6–8 inches. See our paint mixing guide for Zahn cup viscosity testing.
Do I need a separate compressor for painting and for tools like nail guns? Not necessarily — but the compressor must sustain the combined CFM demand if both are used simultaneously. More practically, HVLP spray work and nailing are rarely simultaneous. A single adequately sized compressor handles both in sequence. For large crews where both tools run concurrently, a second compressor or a larger unit is warranted.
