Wood Substrate Preparation for Painters — Sanding, Mill Glaze, Grain Raising, and Sealing
17 February 2026 · ProPainterTools
Wood Substrate Preparation for Painters: Sanding, Mill Glaze, Grain Raising, and Sealing
Wood preparation failures account for a significant share of interior finish defects — bleed-through from knots, raised grain under the topcoat, finish that peels from smooth factory-machined surfaces, and uneven absorption that makes the best coating look amateur. Each of these is a chemistry and preparation problem, not a painting problem. Understanding the wood's surface condition — mill glaze, grain orientation, moisture content, extractive content — allows you to select the correct preparation sequence and avoid predictable failures before they happen. This guide covers the complete preparation sequence for both interior joinery and exterior wood substrates.
Why Wood Surface Chemistry Matters
Wood is not a uniform substrate. It contains:
- Grain orientation — end grain absorbs coating much faster than face grain; side grain absorbs at intermediate rates depending on whether early wood (lighter) or late wood (darker) is predominant
- Extractives — natural oils and resins in species like teak, cedar, and redwood that bleed into coatings and prevent adhesion or cause discolouration
- Mill glaze — a compressed, sealed surface layer created during manufacturing that prevents adhesion on factory-machined wood
- Moisture content — water in the cells that must evaporate below a threshold before any film-forming coating can adhere correctly
Addressing these properties before coating is the preparation. Coating without addressing them produces failures that no amount of quality topcoat can prevent.
Moisture Content Requirements
Coating over wood with excess moisture is the single most common cause of exterior paint failure on new or newly installed wood. The water migrates through the film as the wood dries, creating blistering, delamination, and accelerated weathering.
Acceptable moisture content by species group:
| Wood Category | Maximum MC Before Coating |
|---|---|
| Most softwoods (pine, fir, spruce) | 15%MC |
| Dense softwoods (Southern yellow pine) | 12%MC |
| Western red cedar, redwood | 12%MC (extractives also a factor) |
| Hardwoods (oak, maple, cherry) | 8–10%MC for interior finish work |
| Kiln-dried finish lumber (interior joinery) | ≤ 8%MC |
| Fibre cement siding | 0%MC by design — but check edges for field-cut absorptive ends |
Test with a pin-type moisture meter (two-pin, not pin-less) for wood surfaces, measuring at multiple points and at least 6mm below the surface. Surface readings are unreliable. See our moisture testing guide for the full procedure and meter calibration requirements.
Mill Glaze: Identification and Removal
What mill glaze is: When wood is machine-planed during manufacture, the heat generated by the blades compresses and burnishes the surface cells. The resulting surface is smoother and denser than the underlying wood and has reduced porosity — exactly the opposite of what a primer needs to penetrate and bond.
How to identify it: Mill glaze appears as an unusually smooth, slightly shiny surface on new machined timber. Water droplets bead on it rather than absorbing. Drip a few drops of water onto the surface: if they don't absorb within 30 seconds, mill glaze is present.
How to remove it:
- Sanding with 80 grit is the most reliable method. One pass with an orbital sander or 3–4 strokes by hand is sufficient to break through the compressed layer. Do not sand with grits finer than 100 if you're going to a primer — the surface needs profile, not polish.
- Weathering — if wood is left exposed for 4–8 weeks before painting, UV and moisture cycling break down mill glaze naturally. This is only practical on new construction with a long lead time.
- Chemical deglosser — liquid sandpaper products dissolve mill glaze and light surface sheens. Use with appropriate ventilation. Wipe residue before priming.
Sanding Sequence for Interior Wood Finishing
The sanding sequence for interior joinery and cabinetry is a progression from coarser grits (material removal) to finer grits (surface refinement). Skipping grits leaves deep scratches that show through finish coats.
Standard sequence for bare hardwood and softwood:
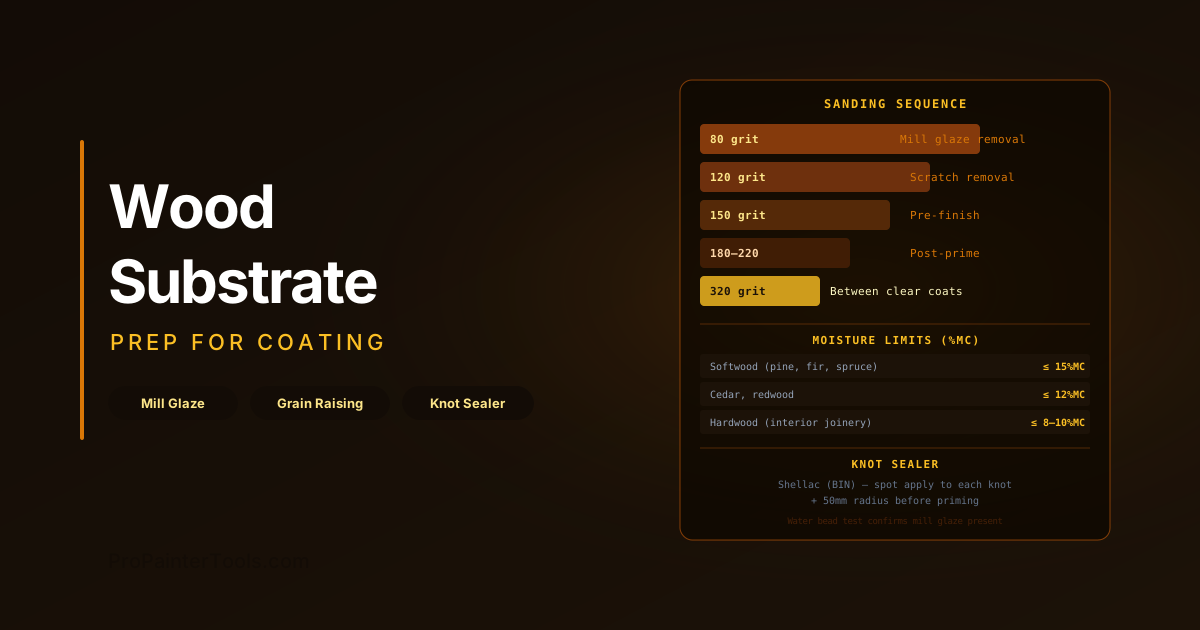
| Stage | Grit | Purpose |
|---|---|---|
| Initial levelling | 80 grit | Remove mill glaze, planer marks, major surface defects |
| Scratch removal | 120 grit | Remove 80-grit scratches |
| Pre-finish | 150 grit | Smooth surface for primer reception |
| Post-prime | 180–220 grit | Knock off raised grain, smooth primer surface |
| Between finish coats | 220–320 grit | Remove dust nibs, improve inter-coat adhesion |
For painted finishes: Sand to 150 grit before priming; 180–220 between coats. Finer is not better — paint needs tooth.
For clear finishes (stain/varnish/lacquer): Sand to 150–180 before staining; 220 before first clear coat; 220–320 between clears. Open-grained species (oak, ash) may benefit from grain filling before the clear coat sequence.
Grain Raising on Water-Based Systems
Why grain raising happens: Water-based primers and finishes cause wood fibres to swell as the water carrier is absorbed by the wood. This raises the surface, creating a rough, fuzzy texture after the first coat. On a bare wood substrate, this is expected — the raised grain must be sanded back before the topcoat.
The procedure:
- After sanding to the pre-prime grit (150 for painted work), apply a thin coat of water over the surface (wet the wood without soaking it)
- Allow to dry fully
- Sand lightly with 180–220 grit to knock back the raised grain
- The surface is now "pre-raised" — the water-based primer or stain will not raise the grain again in the same way
This step is most important on softwoods (pine, spruce) which raise significantly, and on surfaces destined for a clear finish where raised grain would be visible. On painted opaque work, the primer coat raises grain predictably, and sanding between prime and topcoat is sufficient.
End Grain Sealing
End grain (the cross-section of wood cut perpendicular to the fibres) absorbs paint at 5–10× the rate of face grain. On uncoated end grain, primer and paint are absorbed so fast that the film build is inadequate to protect the wood. On exterior cladding, unprotected end grain is the primary entry point for moisture.
End grain sealing procedure:
- Apply one extra coat of primer to all end grain surfaces before priming the face
- Allow to dry; apply a second coat of primer to end grain before priming the rest of the board
- After face priming: inspect end grain for any areas that look dry or uneven — these need a third end-grain coat before topcoat
For exterior cladding, this is mandatory at every cut end, including sill returns, fascia cuts, and any field-cut boards.
Knot Treatment
Resinous knots in pine, fir, and other softwoods bleed amber/brown resin through water-based coatings, particularly in the first 12–24 months after installation and during warm weather. Proper sealing before priming prevents bleed-through.
Knot sealer options:
| Sealer | Best Use |
|---|---|
| Shellac-based primer (e.g., Zinsser BIN) | The standard — seals resin, stains, and odours; bonds to everything; compatible with all topcoats |
| Oil-based knot sealer | Good performance, slow dry; limited availability in low-VOC jurisdictions |
| Aluminium wood primer | Used in the trade for exterior knotty softwoods; provides excellent sealing and corrosion inhibition at fasteners |
Application: Apply shellac primer or knot sealer spot-wise to each knot and a 50mm radius around it. Allow to dry before applying the full primer coat. On boards with knots throughout (e.g., knotty pine panelling), prime the entire board with shellac to avoid spotting.
Note: Shellac primers are not water-based — use solvent-appropriate ventilation and ensure compatibility of the full system if using waterborne topcoats.
Frequently Asked Questions
How do I know when bare wood is ready to prime? The surface should be dry (≤ 15%MC for softwoods, ≤ 12%MC for dense or extractive-rich species), free of mill glaze (water test: droplets absorb within 30 seconds), clean, and dust-free from sanding. Scratches from 80 grit should be removed by 120 grit before priming. End grain should have at least one seal coat before the full prime.
Can I use water-based primer directly over bare teak or cedar? With caution. Cedar and redwood contain water-soluble extractives (tannins) that bleed through latex primers, producing brown staining visible through topcoats. Seal with oil-based primer or an appropriate oil-based tannin-blocking primer first; then topcoat with your water-based system.
Does pre-raised grain need to be sanded if I'm applying a solid-colour paint? On opaque painted work, pre-raising is less critical. Apply the primer, allow to dry, sand lightly with 180 grit between the prime and topcoat, and proceed. The sanding step between coats addresses raised grain. Pre-raising only becomes essential when you're doing clear or tinted stain work where the finish accentuates surface texture.
What grit should I finish to before applying exterior primer? 80–100 grit is appropriate for bare wood going to exterior primer. Exterior systems penetrate better into a slightly rougher surface. Do not sand finer than 120 for exterior primer — the profile improves adhesion and coverage.
For the full set of surface preparation grades relevant to structural and industrial wood substrates, see SSPC-SP3 (Power Tool Cleaning) and SSPC-SP2 (Hand Tool Cleaning).
