Airless Sprayer Maintenance and Repair — Daily Care to Pump Packing Replacement
8 April 2026 · ProPainterTools
Airless Sprayer Maintenance and Repair: Daily Care to Pump Packing Replacement
An airless sprayer that is not maintained will fail at the worst possible time — mid-job, with material in the hose and a client watching. The failure modes of airless sprayers are well-understood and almost all preventable with a consistent maintenance routine. This guide covers the daily flush-and-clean procedure, filter maintenance, pump packing replacement, hose inspection, and a systematic troubleshooting guide for the most common pump problems.
How an Airless Sprayer Works
An airless pump uses a reciprocating piston or diaphragm to generate hydraulic pressure — typically 1,000–3,300 psi for professional units. This pressure forces paint through the fluid hose and through the spray tip orifice (0.009"–0.035" typical), atomising the material without any air. The key components subject to wear are:
- Pump packings — Teflon or leather seals around the piston rod that prevent fluid from bypassing the pump
- Inlet valve and outlet valve (ball and seat) — the check valves that direct flow through the pump on each stroke
- Fluid filter — mesh screen that catches debris before it reaches the pump or tip
- Inlet filter — screen at the suction end, protects the pump from large debris in the bucket
- Tip filter — small screen inside the spray tip guard
- Spray tip — the carbide orifice that determines fan width and flow rate (see our spray tip selection guide)
- Hose — high-pressure nylon-braided or stainless steel braided hose; the primary safety-critical component
Daily Flush-and-Clean Procedure
This is the single highest-impact maintenance task. Skipping it causes dried material in the pump, filters, and hose that requires disassembly to clear.
After every use — with water-borne material:
- Back-flush the suction tube and filter into the paint bucket to remove as much material as possible.
- Move the suction tube to a bucket of clean water.
- Run the pump at low pressure (300–500 psi) with the gun trigger open, cycling clean water through the system until the water runs clear at the tip.
- For water-borne latex: 2–3 gallons of flush water is typically sufficient.
- Remove and clean the fluid filter — use a brush to clear any debris from the mesh.
- Turn off the pump and relieve pressure (trigger the gun until flow stops, then turn pressure to zero before re-triggering).
- Leave the tip in the reversed (unclog) position if storing — this prevents dried material from sealing the orifice.
With solvent-borne material (alkyd, epoxy, polyurethane):
- Flush with the manufacturer-specified solvent (mineral spirits for alkyd, MEK or xylene for epoxy as specified).
- Follow with a water flush only if the product is washable — most solvent-borne materials are not.
- Run a final flush with pump oil or storage oil through the system before long-term storage. Pump oil protects packings from drying and cracking.
- Lubricate the pump rod with a thin coat of pump oil or petroleum jelly.
Filter Maintenance
The airless sprayer system has up to three filters that must be kept clean:
Fluid filter (in-line): Located between the pump and the gun, typically in the manifold or gun handle. Mesh size is typically 30–60 mesh for standard paints. Fine finishes (cabinet work, enamels) require a finer 60–100 mesh filter to protect the tip from larger particles. Clean at the end of every job and inspect for damage. Replace if the mesh is torn or deformed.
Inlet (strainer) filter: Located at the suction tube, this coarse mesh filter (typically 16–20 mesh) protects the pump from large debris in the paint bucket. Clean at the beginning of each job and whenever you notice reduced flow that is not pressure-related.
Tip filter: A small mesh insert inside the tip guard on many Graco and Titan guns. Rarely cleaned, often forgotten — this is a common cause of intermittent tip clogging. Remove and clean it whenever you change tips or when you experience tip problems that cannot be resolved by clearing the tip itself.
Pump Packing Replacement
Pump packings seal the piston rod as it reciprocates. When packings wear, paint bypasses the seal, appearing as a drip or weep from the packing nut area, or causing a loss of maximum achievable pressure. Worn packings cannot be fixed by tightening — the packing nut should be snugged but not torqued; overtightening accelerates packing wear and increases pump friction.
Signs that packings need replacement:
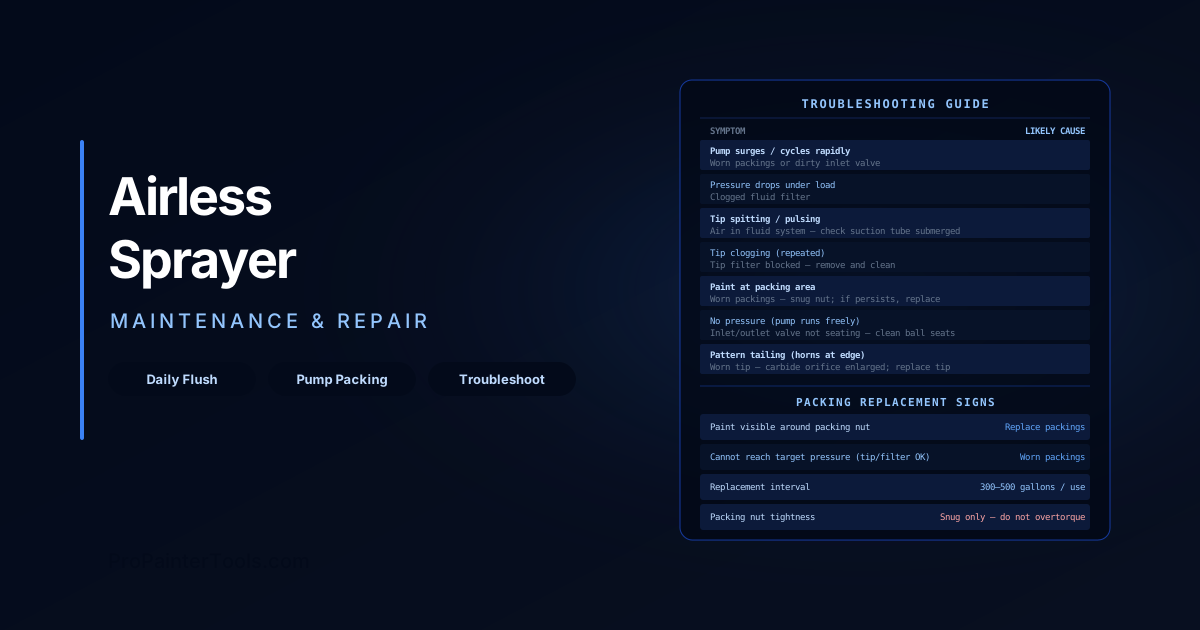
- Paint visible around the packing nut area (not just condensation)
- Unable to reach target pressure even with new tip and clean filters
- Pump running continuously at low load without building pressure
- Pump stroke frequency increasing to maintain target pressure (the pump is working harder to compensate for bypass)
Replacement interval: Packings last 300–500 gallons of material for most professional-grade piston pumps with consistent daily flushing. Heavy latex, textured coatings, and abrasive materials (elastomeric, stucco paint) wear packings faster.
Replacement procedure (general — always follow model-specific manual):
- Relieve all system pressure completely.
- Flush the system clean — never disassemble a pump with material under pressure.
- Remove the packing nut (typically a large hex nut above the pump body).
- Withdraw the piston rod assembly.
- Remove the worn upper and lower packings — note orientation; packings are directional.
- Lubricate new packings with pump lubricant before installation.
- Reassemble in reverse order. Snug the packing nut — do not overtorque.
- Prime the pump with water or pump oil before running on material.
Packing kits are model-specific — Graco and Titan packings are not interchangeable. Keep a spare packing kit for your model in your service kit.
Hose Inspection and Safety
The high-pressure hose is the safety-critical component of the airless system. A hose failure at 3,000 psi causes airless injection injury — paint forced through the skin into tissue. This is a surgical emergency that requires immediate medical treatment.
Hose inspection checklist (before each use):
- Check the full length for cuts, abrasions, or visible damage to the outer jacket
- Check both end fittings for corrosion, cracks, or leaks (even small seeps indicate the fitting is failing)
- Never use a hose with a bulge in the outer jacket — this indicates the inner liner is failing
- Never repair a damaged high-pressure hose with tape or clamps — replace it
Hose maintenance:
- Coil hoses loosely — sharp bends and kinks fatigue the inner wire braid
- Keep hose ends capped when not in use to prevent debris from entering
- Replace swivel fittings and couplers when they show leakage or difficulty connecting
Troubleshooting Guide
| Symptom | Most Likely Cause | Diagnosis / Fix |
|---|---|---|
| Pump surges (cycles rapidly without holding pressure) | Worn packings / dirty inlet valve | Check for paint at packing nut; clean or replace inlet ball and seat |
| Pressure drops under load | Clogged fluid filter | Remove and clean fluid filter |
| Tip spitting / pulsing spray | Air in the fluid system | Check suction tube is submerged; check inlet filter for air leaks at the suction nut |
| Tip clogging | Dried material / debris in tip | Reverse tip to clear; if recurring, clean tip filter |
| No pressure at all (pump runs freely) | Inlet or outlet valve not seating | Remove and clean ball seats; replace if scored |
| Paint dripping from packing area | Worn packings | Tighten packing nut slightly; if persists, replace packings |
| Spray pattern tailing (horns at edge) | Worn tip / incorrect pressure | Increase pressure; if persists, replace tip — carbide is worn |
| Pump won't prime | Air lock in pump | Submerge suction tube; rock the pump by hand; prime with thin water first |
| Motor runs but pump doesn't stroke | Broken connecting rod or pin | Inspect drive mechanism; unit requires service |
For tip-specific troubleshooting related to fan width and orifice choice, see our spray tip selection guide. For PPE requirements when working with solvent-borne materials including isocyanates, see our safety gear and PPE guide.
ProPainterTools allows you to log equipment maintenance events — including packing replacements, filter changes, and service intervals — as part of your job records, so you always know when each unit is due for service.
Frequently Asked Questions
How often should I replace the pump packing? Every 300–500 gallons of material is a general guideline, but monitor for the symptoms listed above. Heavy elastomeric or textured coatings accelerate wear. Consistent daily flushing with clean water is the single biggest factor in extending packing life.
Can I use any pump oil for airless sprayer lubrication? Use the pump lubricant or throat seal liquid specified by the manufacturer (Graco Throat Seal Liquid, Titan pump conditioner). Avoid petroleum-based oils with water-borne coatings — some can contaminate the next batch of material. Pump-specific lubricants are formulated to be compatible with both water-borne and solvent-borne materials.
The tip won't clear after reversing — what do I do? Relieve pressure, remove the tip from the guard, and clear it with a small wire or compressed air through the orifice from the back end. Never push a wire through from the spray end while the system is pressurised. If the tip orifice is permanently enlarged or deformed, replace the tip — a worn orifice cannot be restored.
What is the correct tightness for the packing nut? Firm by hand plus a quarter-turn with a wrench is the general guideline — snug, not torqued. If the nut is tight and paint still appears at the packing, the packings are worn and need replacement. Overtightening increases friction and wears the packings faster.
